2010. 6. 9. 12:30ㆍ프로그래밍일반
UI구성에 대해서 하기전에 가장 중요한것을 알아야 한다.
프로그램 내에서 사용하는 모든 Activity 는 Manifext.xml에 선언되어야 한다. 명심하시기를
---------------------------------------
1. 먼저 TabActivity 를 만들어서 넣어보자
public class RosaActivity extends TabActivity {
/** Called when the activity is first created. */
@Override
protected void onCreate(Bundle savedInstanceState) {
super.onCreate(savedInstanceState);
setContentView(R.layout.main);
final TabHost tabHost = getTabHost();
tabHost.addTab(tabHost.newTabSpec("rose")
.setIndicator("list")
.setContent(new Intent(this, RosaRoseList.class)));
tabHost.addTab(tabHost.newTabSpec("tab2")
.setIndicator("photo list")
.setContent(new Intent(this, List1.class)));
// This tab sets the intent flag so that it is recreated each time
// the tab is clicked.
tabHost.addTab(tabHost.newTabSpec("tab3")
.setIndicator("destroy")
.setContent(new Intent(this, List1.class)
.addFlags(Intent.FLAG_ACTIVITY_CLEAR_TOP)));
}
2. ListActivity 를 만들어본다.
public class List1 extends ListActivity {
@Override
public void onCreate(Bundle savedInstanceState) {
super.onCreate(savedInstanceState);
// Use an existing ListAdapter that will map an array
// of strings to TextViews
setListAdapter(new ArrayAdapter<String>(this,
android.R.layout.simple_list_item_1, mStrings));
getListView().setTextFilterEnabled(true);
}
private String[] mStrings = {
"Abbaye de Belloc"};
}
3. main.xml을 다음과 같이 구성한다.
android:id="@android:id/tabhost" android:layout_width="fill_parent"
android:layout_height="fill_parent">
<LinearLayout android:orientation="vertical"
android:layout_width="fill_parent" android:layout_height="fill_parent"
android:padding="5dp">
<TabWidget android:id="@android:id/tabs"
android:layout_width="fill_parent" android:layout_height="wrap_content" />
<FrameLayout android:id="@android:id/tabcontent"
android:layout_width="fill_parent" android:layout_height="fill_parent"
android:padding="5dp" />
</LinearLayout>
</TabHost>
4. 가장중요한 Manifest.xml에서 List1 Activity 와 RoseActivity 2개 Activity 를 등록하자.
정말 중요하다. 이것을 하지않으면 아무런 에러없이 강제종료 된다.
대부분의 다른 강좌에서는 이것을 모두 빼고 얘기하니 될리가 있나 -.-
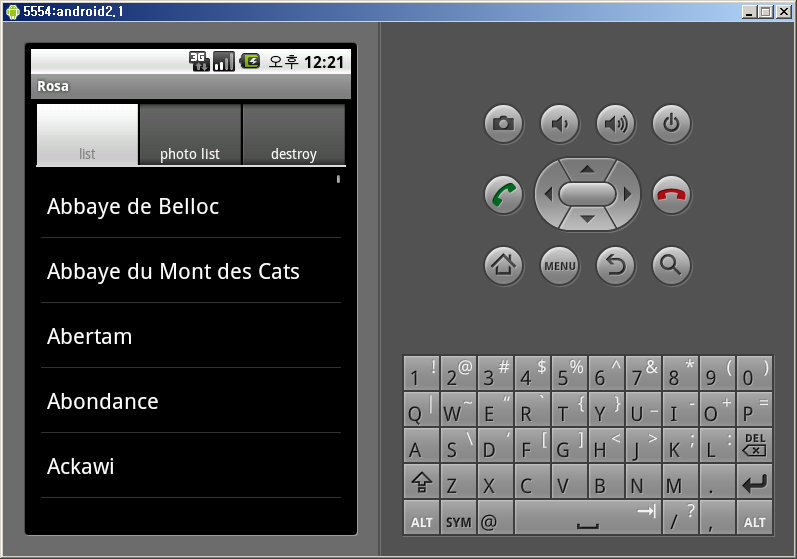
5. 실행하면 아래와 같은 화면을 볼 수 있다.