2007. 2. 20. 10:25ㆍJava
정말 최고로 흥분되는 사건이지요.
자바개발자인 저도 그렇습니다.
자신이 쓰는 언어가 점점 좋아지는 느낌 정말 좋네요.
비록 새로 추가되는 기능들이 윈도우 개발자분들은 "이게 뭐야~" 라고도 하시겠지만
Java 쪽에서는 큰 이슈가 아닐수 없습니다.
각설하고,
JDK 6 에 많은 기능이 추가되었습니다. ver 5 에서도 많은 기능이 추가되어 너무 좋았지만
JDK 6 도 만만치 않네요.
마침 http://www.java.sun.com에 jdk6의 새로운 기능에 대한 컬럼이 보여서 살펴보았습니다.
원문 그대로 보는것은 좋지만, 나름대로 실행해보고 느낌을 적고 싶어 이렇게 글을 썼습니다.
원문은
==> http://java.sun.com/developer/technicalArticles/javase/6_desktop_features/
글이 아주 좋네요~
"JDK 6 새로운 기능들"
1. Splash Screens
기존에는 본 프로그램을 보여주기전에 스플래시 스크린이란게 없었죠. awt나 swing으로 임의로 만들어 썼지요. 이제 지원하네요.
컬럼에 있는 예제를 실행해봤습니다. Eclipse로 구동했습니다.
참 실행할때 vm 옵션에 (eclispe>run 메뉴에서 vm 옵션을 설정할수 있어요)
java -splash:filename.gif SplashTest
같이 해주어야 합니다.

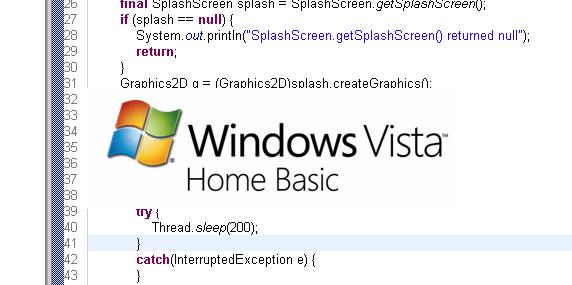
아래와 같은 본래 프로그램이 뜨기전에 스플래시 화면(위쪽의 Vista 화면)이 뜨네요.
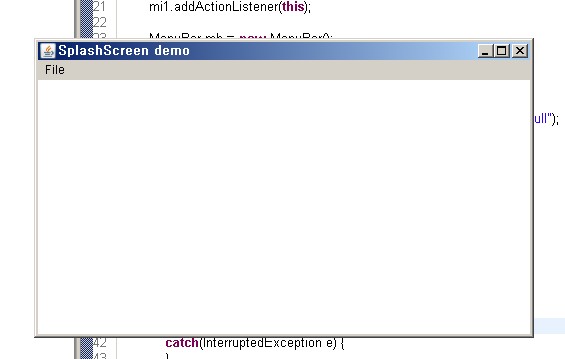
아래는 스플래시 화면이 뜨고난후 나타나는 프로그램입니다.

아주 잘되네요.~ 보통 스플래시 화면은 본 프로그램의 로딩이 길때 임시로 보여줍니다. 이 시간을 조정하는 방법도 있네요.
아래는 컬럼에 올라온 예제소스 입니다.
===========================================================================================
import java.awt.*;
import java.awt.event.*;

public class SplashTest extends Frame implements ActionListener {
    static void renderSplashFrame(Graphics2D g, int frame) {
        final String[] comps = {"foo", "bar", "baz"};
        g.setComposite(AlphaComposite.Clear);
        g.fillRect(130,250,280,40);
        g.setPaintMode();
        g.setColor(Color.BLACK);
        g.drawString("Loading "+comps[(frame/5)%3]+"...", 130, 260);
        g.fillRect(130,270,(frame*10)%280,20);
    }
    public SplashTest() {
        super("SplashScreen demo");
        setSize(500, 300);
        setLayout(new BorderLayout());
        Menu m1 = new Menu("File");
        MenuItem mi1 = new MenuItem("Exit");
        m1.add(mi1);
        mi1.addActionListener(this);

        MenuBar mb = new MenuBar();
        setMenuBar(mb);
        mb.add(m1);
        final SplashScreen splash = SplashScreen.getSplashScreen();
        if (splash == null) {
            System.out.println("SplashScreen.getSplashScreen() returned null");
            return;
        }
        Graphics2D g = (Graphics2D)splash.createGraphics();
        if (g == null) {
            System.out.println("g is null");
            return;
        }
        for(int i=0; i<100; i++) {
            renderSplashFrame(g, i);
            splash.update();
            try {
                Thread.sleep(200);
            }
            catch(InterruptedException e) {
            }
        }
        splash.close();
        setVisible(true);
        toFront();
    }
    public void actionPerformed(ActionEvent ae) {
        System.exit(0);
    }
    public static void main (String args[]) {
        SplashTest test = new SplashTest();
    }
}
2. System Tray
보통 메신저나 데몬툴, 네트워크 아이콘이 윈도우 가장 오른쪽 시간 나오는 쪽에 등록되는 것 아시죠? 시스템 트레이 아이콘인데, 윈도우 개발자 분들은 코웃음 치겠지만, 자바는 그동안 수작업으로 만들었죠. 이제
JDK에서도 이 기능을 지원하네요
이거명품 입니다. ^0^ ㅋㅋㅋㅋㅋ
역시 예제를 실행해 보았습니다.
실행하면 등록한 이미지 아이콘이 시스템 트레이에 등록됩니다.

Tray Demo 보이시나요? 죽입니다. ㅎㅎ
마우스를 대면 소스내의 팝업에서 설정한 메뉴들이 주욱 보입니다. ^^
아주 맘에 드는 기능이죠.
아래는 원본 소스 입니다.
========================================================================================
/*
* Copyright 2005 Sun Microsystems, Inc. ALL RIGHTS RESERVED
* Use of this software is authorized pursuant to the terms of the
* license found at http://developers.sun.com/berkeley_license.html
*
*/
import java.awt.*;
import java.awt.event.*;
public class SystemTrayTest
{
public SystemTrayTest()
{
final TrayIcon trayIcon;
if (SystemTray.isSupported()) {
SystemTray tray = SystemTray.getSystemTray();
Image image = Toolkit.getDefaultToolkit().getImage("log.jpg");
MouseListener mouseListener = new MouseListener() {
public void mouseClicked(MouseEvent e) {
System.out.println("Tray Icon - Mouse clicked!");
}
public void mouseEntered(MouseEvent e) {
System.out.println("Tray Icon - Mouse entered!");
}
public void mouseExited(MouseEvent e) {
System.out.println("Tray Icon - Mouse exited!");
}
public void mousePressed(MouseEvent e) {
System.out.println("Tray Icon - Mouse pressed!");
}
public void mouseReleased(MouseEvent e) {
System.out.println("Tray Icon - Mouse released!");
}
};
ActionListener exitListener = new ActionListener() {
public void actionPerformed(ActionEvent e) {
System.out.println("Exiting...");
System.exit(0);
}
};
PopupMenu popup = new PopupMenu();
MenuItem defaultItem = new MenuItem("Exit");
defaultItem.addActionListener(exitListener);
popup.add(defaultItem);
trayIcon = new TrayIcon(image, "Tray Demo", popup);
ActionListener actionListener = new ActionListener() {
public void actionPerformed(ActionEvent e) {
trayIcon.displayMessage("Action Event",
"An Action Event Has Been Peformed!",
TrayIcon.MessageType.INFO);
}
};
trayIcon.setImageAutoSize(true);
trayIcon.addActionListener(actionListener);
trayIcon.addMouseListener(mouseListener);
// Depending on which Mustang build you have, you may need to uncomment
// out the following code to check for an AWTException when you add
// an image to the system tray.
try {
tray.add(trayIcon);
} catch (AWTException e) {
System.err.println("TrayIcon could not be added.");
}
} else {
System.err.println("System tray is currently not supported.");
}
}
/**
* @param args the command line arguments
*/
public static void main(String[] args)
{
SystemTrayTest main = new SystemTrayTest();
}
}
정말 잼있네요. 이 2가지 기능외에도 무지 많네요. 시간관계상 천천히 둘러보며 실행하여 볼까 합니다.
예제소스는 압축해서 올릴께요.
 invalid-file
예제소스들
ps. 설 후유증인지 몸이 쫌.. ㅎㅎ
참고로 전 휴일에는 절대 글을 쓰지 않습니다. 놀아야죠 =,.= ㅋㅋ
by ncanis(조성준)