Creating a simple dialogue box
To get started with the new uGUI system, grab a copy of Unity 4.6. Whilst you are waiting for the download to finish, grab yourself a coffee / tea / warm beverage to stave off the cold weather outside.
We’re going to be creating a dialogue box which adapts to any resolution with two buttons which modifies some text within it without writing a single line of code.
Creating a Canvas
To get started, create new scene and create a Canvas (GameObject > UI > Canvas). You’ll notice two game objects pop-up, Canvas and EventSystem. I’ll talk about the EventSystem GameObject and what it does later on.
Select the Canvas Game Object and you will see the new Transform system (Rect Transform) which is used for all of the UI objects. The Canvas component defines the method of rendering the UI, keep it set to Screen Space – Overlay for now.
The Canvas Scaler object is rather complicated to explain, however Unity have already done so, have a read of it here.
The Graphic Raycaster allows you to define how the user interacts with the UI. For example you can switch the blocking mask to be blocked by certain layers. For now leave this to its default settings.
Creating a Panel
Create a Panel (GameObject > UI > Panel), by default this panel will stretch to fill the entire screen. You’ll notice that by default the panel is the full width and height of the screen. Leave it be for now, we’re going to add some content to our new panel and make the panel adapt to that.
Click on the panel, and add the Vertical Layout Group script and the Content Size Fitter script. First lets edit the Vertical Layout Group, you will notice a Padding dropdown panel, this defines the amount of padding around the extents of the content, set them all to 10. The spacing defines the distance between the content itself, set that to 10 as well. Now set the Content Size Fitter to “Horizontal Fit – Unconstrained” and “Vertical Fit – Preferred Size”, this will allow the dialog box to scale vertically dependant on the content within it whilst retaining the same width.
Adding some content
Click on the new Panel, and then create a text object (GameObject > UI > Text). Set the font size to 25 and enter some text into the Text area. You will notice that the panel is expanding or contracting dependant on the content within it. Lets add two buttons to this now. You can also use basic HTML markup if you have Rich Text ticked, documentation here.
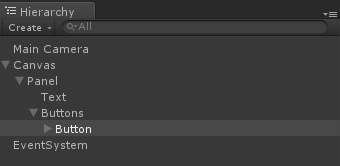
Create an empty gameobject within the panel and name it “Buttons” (or anything you fancy). Give the empty gameobject a Horizontal Layout Group. Now if you click on the Buttons object and create a button (GameObject > UI > Button) and set the parent to Buttons. Your Hierarchy should now look like this:
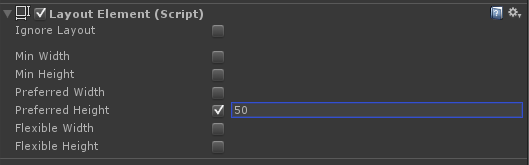
If you are thinking that your button looks broken, you’d be right. In order to force the button to have a set height we need to explicitly set it by adding a Layout Element to the Button game object. Now tick the Preferred Height check box and set the Height to anything you want (I set it to 50).
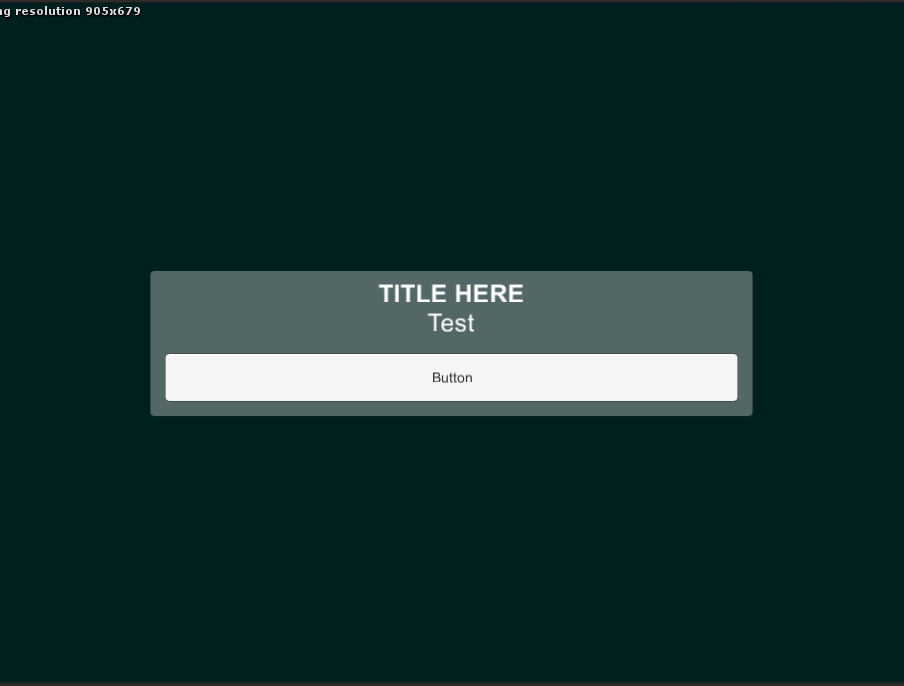
Hopefully now your dialog box will look like this:
 Lets add another button to show off how the layout component deals with multiple children, Right click the Button gameobject and pressDuplicate. You should now have two buttons of equal size next to each other. If you was to start resizing the Game view you would see the UI contracting and expanding to accommodate the new resolution too.
Hooking up the buttons to do something.
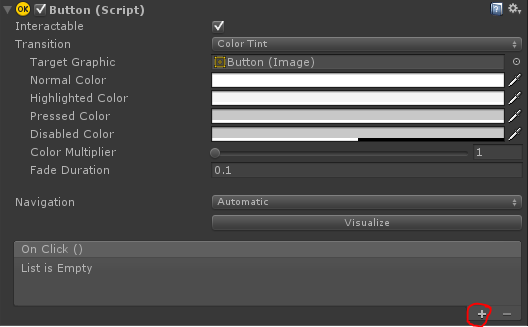
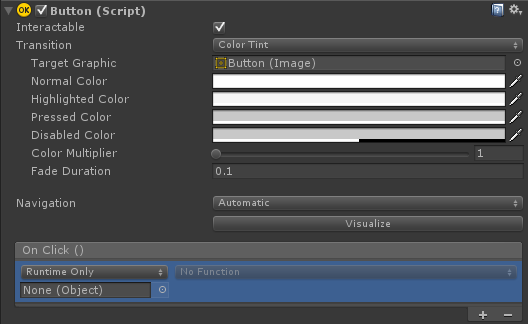
If you click on the first button gameobject, you will see it has a script called, conveniently, Button. This component has at the very bottom of it “On Click()”. This allows you to tell the button what to do on click, via the inspector you can set the button to fire any function or modify any property without having to write any code. Lets change the Text within the Dialog using this button.
Click the little plus button circle below:
You’ll see it switch to:
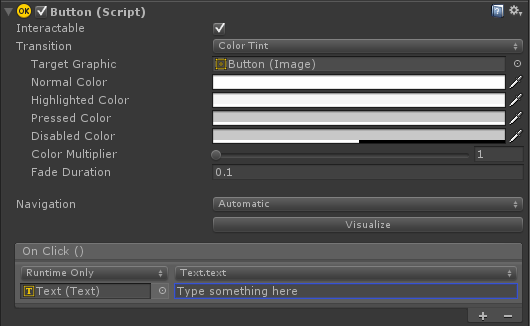
Now, from the Hierarchy, drag the Text object from the panel into the area named “None (Object)”, click on “No Function” afterwards. You’ll notice that it lists all of the components for that game object along with all of their functions and public properties, Select Text > string text. There will be a text field appear below it, type anything you want in there.
It should look like this now:
Now go to the other button, and do the same thing to it however change the text to something else.
If you press play now and press the buttons you will see the text changing within the dialogue without you having to write a single line of code.
What next?
This little guide should help you understand a few of the basics of uGUI, keep experimenting with it and help other’s learn more about it. I am yet to fully explore all of uGUI and I’m sure there are a lot of features I haven’t even began to play with yet.
Be sure to check out Unity’s own tutorials about their new UI too, they are here. Also if you want to have a peek at their source-code for the UI system, you can grab it here.